A Second Bowl

End of last year, I decided to set up a second bowl.

This one will have a goldfish in it, to prove that it is actually possible to keep a healthy planted bowl with this famous herbivore.

Materials needed:
1. Fish bowl
2. DIY Base Fertilizer
3. River sand
4. Hardy aquatic plants. In this case I used Vallisneria Nana
5. Fauna: Comet goldfish x1 , Chinese Algae Eater x1

As goldfish is a renowned scavenger, I only use the toughest plants (Vallisneria) for this setup

A Comet was chosen as it is the most common variety of fancy goldfish available (and cheap too).

Goldfish will produce a lot of waste. That way, algae will grow easily.
That’s the reason why I kept a Chinese Algae Eater together with the goldfish

Updates on D+30,

FTS,

The view from above,

Fate of the first bowl,

How to apply Vladimir Simoes Method

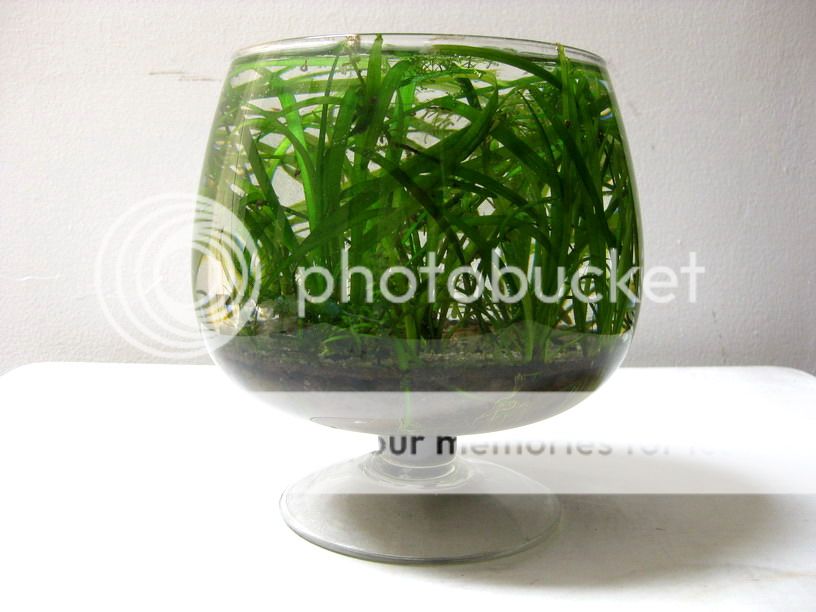
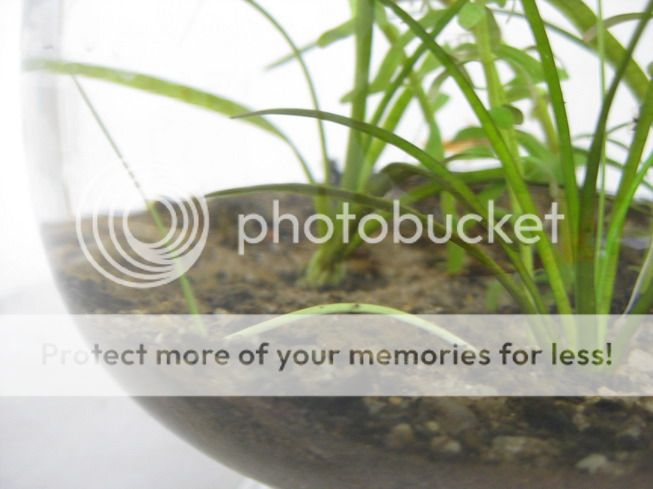
Ron Suzuky is a creator of spectacular aquariums in Londrina, Paraná and Won several awards aquascaping. Several tanks produced by him can be seen in our gallery planted. He kindly gave us a walkthrough that shows the installation of a tank 60cm by his method. Consider: Aquarius: 60x30x30cm Substrate: Earthworm casting treaty, laterite, construction sand sifted Filtering: None! only water changes of 40% every other day. Illumination: Half a fluorescent lamp 40w Sylvania’s Luminous White, 6500K. plants: Glossostigma elatinoides , Hemianthus micranthemoides , Alternanthera reineckii “lilacina” Anubias bartherii “nana”, Microsorium pteropus , Limnophila sessiliflora , Rotala rotundifolia , Didiplis diandra , Heteranthera zosterifolia, inclinata Ludwigia, Hygrophila polysperma “sunset”, Egeria cf. cobras , Lilaeopsis brasiliensis Fish: 10 Otocinclus affinis , 06 Gymnocorymbus ternetzi CO2: Diffuser Homemade distributed by porous stone, removed all night.Aquarium, not estranhem risks in glass because he was very old … Earthworm casting treaty … Humus in the aquarium … Spreading the humus with a square ruler, helps a lot! Laterite gravel … Laterite already spread in the aquarium … Construction Sand sifted already spread the aquarium … trunks and stones … I consider this the most important part of a layout! sometimes I lose hours to put a single trunk or set of stones I put a little water to facilitate the planting of floor plans, I think better than planting without water … Glossostigma elatinoides, I plant them usually with two nodes, but you can either plant them from node to node, as with multiple nodes …

Using tweezers, I plant the Glossos one by one … The aquarium with Glossos already planted … Here I am planting the Lilaeopsis brasiliensis … I like to plant the Lilaeopsis between the stones, I think that gives a look pretty cool … The aquarium with Lilaeopsis and Glossostigma … Microsorium pteropus, you can tie it in the trunk or fix the gaps between the trunk (which I did in this case), if not to put you in the trunk it can hold a small stone and simply put in the desired location, so no need to bury the roots which could adversely affect the development of it a bit … Anubias nana … in this case I held her in small stones, to ease some of them placing in the aquarium … Putting the aquarium … The Microsorium and Anubias already placed … The other plants that will use the assembly …

I fill the tank a little more to plant taller plants … here is already planted a piece … The fully planted aquarium … After the planting, I fill the tank completely and retreat cut sheets with a small net … The aquarium finished … date of assembly – 20 October 2003 The aquarium on November 10, 2003 Day of pruning … December 17, 2003, of course I had already done some podinhas before that day, but only a few plants that were growing in a disorderly fashion! In fact, you should not let get to this point … the ideal would be to do the pruning before … Do not be sorry! Make pruning! I always try to prune the plant in half, of course it depends on plant to plant … The aquarium soon after pruning, is anyway … Ugly! but it is for a short time … The result of pruning! Already gives to start another tank … The tank one month after pruning … January 16, 2004 Some observations about this step by step … – This tank was assembled for six months only … could keep much longer, like any other planted aquarium! – The Glossos were not flat on the floor, they rose a bit, but you could leave them in front of aqua quietly … – The plants grew well, but if I had more lighting would certainly have been much better … else, just did this test in low light due to the height of the aquarium which is very low! aquarium if it were higher, this would probably be insufficient lighting … – Fish do not feel anything at all with water exchanges interspersed. – probably due to lack of water movement, and half again appeared a “cloud” of infusoria in the water leaving the turbid medium color, but located! ie where was the only cloud infusoria …

Source: http://www.plantasdeaquario.com/dicas_do_rony.htm

PDF Version can be downloaded here: https://www.dropbox.com/sh/wc83unm8fnxhgkh/h9zBpsZFq2

My Planted Bowl

At last, I have the opportunity to set up an el natural tank.

Based on the link from Diana,

Click to access 00388Shrimp.pdf

I have made my first planted bowl.

Updates on D+2,
 photo plantedbowl_zps4b6c661c.jpg

Materials needed:
1. Fish bowl
2. Mineralized garden soil
3. Construction sand
4. Hardy aquatic plants. In this case I used sagittaria subulata, rotala sp.”green” was added later
5. Fauna: RCS x1 (RIP), ember tetra x1 (RIP), changed to platy fry x10

Updates on D+20,
 photo plantedbowl2_1_zpsdffa5cb4.jpg

The RCS died, changed to ember tetra.

FTS,
 photo plantedbowl2_2_zps771c7a37.jpg

Sagittaria subulata begins to send runner,
 photo plantedbowl2_3_zps3f968000.jpg

Rotala sp. “green” has taken root,
 photo plantedbowl2_4_zps1848691b.jpg

The view from above,
 photo plantedbowl2_5_zpsf6515f6f.jpg

The whole setup,
 photo plantedbowl2_6_zps7b0d4c43.jpg

Doesn’t use artificial lighting at all,
simply relies on sunlight from my backyard.

Want to try?

Substrate for El Natural tank – C.Ro.A Method

Instructions for Preparing Nutritious with Laterite Substrate


PHOTOS invaluable collaboration, FINGER AND DATA: Matias Villarreal, gracie M @ aunts!

This is a compilation of the recommendations published in the forum. Not to take it exactly, but rather as a summary of practical rules, obviously subject to correction.

Basic Ingredients
  • Laterite
  • Fine Sand (common construction without additives)
  • Fine gravel (where possible number 20)
Calculation:

Depending on the type of plants you want to make will depend on the width of the substrate we must do. For example, as ground cover or Glossostigma crenata marcilea elastinoides the substrate can be nutritious as growth guy redicular thereof is also low. For other plants the substrate must be deeper, for example for quadricostatus Echinodorus. Something it would average between 2 and 4 cm, and in places where ground cover will be up to 1 cm. Suppose we want to make a substrate of 3cm on average. We multiply the base of the aquarium substrate thickness to calculate the volume. If you have an aquarium with a base of 80 cm by 40 cm, this would give us that we have to make a substrate of 9600 cm3 (80 cm x 40 cm x 3 cm) or 9.6 liters. ratios generally recommended are: 20 to 30% of laterite 20 to 30% of fine gravelcomplete The remaining fine sand need Following the example approx. : 2-3 liters of laterite 2-3 liters of fine gravel and between 4-6 liters of sand to complete the 10 liters of substrate. Failure to have the right amount of laterite, can be lowered by up to 10% without drawbacks and uploading the amount of sand. Depends laterite have moisture, but approx. 1 liter of dry laterite weighs 1.5 kilos. nutritious on the substrate must put at least 3 cm of fine gravel. In this case would again Gravel 9600 cm2 or 10 liters approx. should choose a small-grained gravel. The reason is that it is very easy to plant ground cover with the grain, and root development is easier for plants. In this picture we show different types of gravel: 1: Construction sandy 2: q common gravel sold in aquariums for fish tanks 3: gravel 12 4: 20 gravel gravel desirable choice number 20.

Steps:
  1. Wash the sand and gravel to remove impurities.
  2. Put laterite oven 20 minutes.
  3. Sift the laterite to make it as a powder (pictured lack gravel):
  4. Mix all the ingredients (laterite, sand and gravel) and it is fully homogeneous. This is enough, but you can add other ingredients such as peat, worm castings, activated charcoal or fertilizer. This is a total risk of the consumer and the subject should be read before starting something. If we wanted to add activated carbon, a tablespoon should be calculated every 10 liters. Before being introduced coal must be ground to a powder becomes. In the picture the white stones have to be removed. Whenever possible make the dry mix. while more liquid substrate more risk we run our starting an aquarium with muddy water.

  5. The next step is to place the substrate in the tank and spread to desired height. If we are to make a good recommendation is ground cover in the front leaving a height of 2 cm and half aquarium put back all the excess substrate, in this way stem plants that stay behind have greater contact with the substrate nourishing roots. But if we see the nutritional substrate we went a little watery what we can do is give as pat to the substrate, it makes the water rises to the surface and then dry it with paper towels for example. Another option is to let the substrate dry steeping just a few days, but not much.

  6. Put on fine gravel substrate. At least 3 cm. Anyway if we have ground cover, for the distribution of the gravel can be used the same distribution scheme for the substrate, the front has a 2cm layer while the rear a greater extent, thus the plants stem can be planted easily and achieve optimal redicular tremendous growth. Other detail we can do in our substrate are reliefs to highlight certain areas, for example, a mountain with glosos. If they are not on a major relief striker would never because when e.tenellus tapicen front view glossos not allow.
  7. Use a plate for filling the tank, to avoid mixing the substrate with the water column.
  8. Do not fill the tank completely, but only 10 cm. Then start planting. Remember that the aquarium should start with as many plants as possible.
  9. Finish filling the aquarium.
  10. During the first few weeks is very important to make frequent water changes and abundant, at least 50% a week. The more organic matter you have placed the substrate, such as humus or topsoil, more important are the changes of water to prevent algae problems. At one extreme, in the black earth aquarium Diana Walstad recommends changes up to 80% for 15 days during the first month and a half.

Other recommendations:
desplantar When we do it carefully so that our media does not mix with the water column. fertilizing is not recommended the first few weeks, but when it reaches maturity our aquarium and obviously acceptable dose have fertilized the to do based on the amount of plants we have and not just following the instructions. Corrections are welcome! Greetings! Juan

Source: http://www.croa.com.ar/ipb2/index.php?showtopic=8671

Substrate for El Natural tank – Sherry Mitchell Method

Aquatic Plant Potting Soil Recipe

By Sherry Mitchell

Sherry Mitchell maintains a beautiful 2000 gallon pond with several varieties of water lilies. To pot her lilies, and other aquatic plants, Sherry uses this recipe to meet their nutrition requirements.

Ingredients:

  • Osmocote Time Release Fertilizer
  • One Part Heavy Garden Compost or Topsoil (no peat!)
  • One Part Walmart Red Bag Plain Kitty Litter
  • Gravel

Instructions:

  1. Put fertilizer in bottom of planting pot.
  2. Layer garden compost.
  3. Plant aquatic plants.
  4. Top with a layer of kitty litter.
  5. Wet with water
  6. Top with gravel.
  7. Slowly sink to desired level in pond or water garden.

For more information on Sherry garden and pond, please see our June 2009 meeting notes.

June 2009: Sherry Mitchell's Pond